Showing posts with label Management. Show all posts

Saturday, July 7, 2012

Classroom Magic

Thursday was  International Blog-Hopping Day and TBA was hosting a link up of several Linky Parties!  I am a few days behind, but thought I would link up and share too.


is hosting

A Little Magic

It’s a terrible picture of my behavior system, but my cell phone does not take great photos and everything is packed up for the move.  I went back to my old ring and clip system about mid-year last year and think I will continue it with my third graders.  I was using the clip chart that has been all over blog world.  It just wasn’t working for me.  Only a few kids were getting to the top, I was forgetting to use it, and the kids that really needed to have consequences were sometimes able to get out of it by doing something to get their clip out of the hot zone.  I just really needed to tighten down on some of the behaviors.

1215111428_thumb

Long story short, this system really works for me. It uses a pocket chart with several pockets per row.  I think is was for attendance.  We have a system widely used through my building call  ”Shoot for a Rainbow.”  Some use the clip style system.  I use cards in the order of a rainbow on a ring.  The last card is a rainbow.  The kids switch their cards as a reward.  The cards do not go back to red every day.  The kids keep flipping until they get to the rainbow at the end. when that can claim a reward.

Different teachers use the rewards in a ton of different ways.  I put a card in the back of the pocket with the students’ number and, when they reach the rainbow, they put their name card in the pockets at the top with rewards.  They are easy, but effective rewards.  I usually pick 3 or 4 rewards for a month or so.  I had:

  • read to the class
  • share
  • line ender
  • switch seats
  • bonus VIP day
  • share a writing piece with the class

They cost nothing and result in the minimum of interruption.

The clips are the  reminder/consequence system and are on the front of each pocket.  It aligns with 1, 2, 3, Magic, which is another system popular in my school.  The clips all begin on green.  The yellow is a reminder, the orange is a warning with 5 minutes of recess owed, and the red is 10 minutes of recess owed and a parent phone call.  This worked wonders!  The clip goes back to green each morning.

I guess I have learned once again that I should K.I.S.S. (keep it simple silly).  I changed a lot of things last year because I loved how someone else did it and realized I should stick to what works rather than try to use something that doesn’t work for me.  It was taking too much time and energy to change my thinking and I wasn’t consistent enough.

I am planning to use this system in my third grade classroom as well.  I think it translates well for all elementary grade levels and give a good picture of each students behavior over time and give the teacher the ability to collect data if needed.

Monday, June 25, 2012

7 Habits of Happy Kids

Have you seen this book?

I just found out Steven Covey has written a book for children.  It looks like has stories for each of the habits. It seems like we spend so much time on social skills and self-esteem.  Self-awareness and woprk habits are huge areas that we address in schools now, too.  We use the Second Steps Program, but I think I will snag if from my local library and maybe start out my year with it!

Scrappin Doodle has a Graphics set too!

Tuesday, May 29, 2012

Behavior Management Resources

I thought would share a couple great resources for behavior management.  If you are like me, you have a couple behavior charts or modifications all going at once and it can be tough to find both the resources and the time to get them all do.  Behavior Charts 4 Kids has great themed punch cards.  Free Printable Behavior Charts.com has great charts, printable coupon and rewards, and articles for the classroom.  Check out these sites if you are looking for behavior management resources.

image

Toy Story Behavior Chart

image

Tuesday, February 21, 2012

Management Linky

Miss T is having a linky party on anything management related.
MsT3

I did a post a while ago about my management system.  Click here to check it out.


1215111428_thumb


I left school on Friday primed for vacation and a little evening with work friends.  Of course, I left a whole bunch of things behind.  I went in this morning to pick up some stuff and ended up working for 2 1/2 hours in my classroom. I was dedicated to doing the clutter free thing, but just could not get myself to follow through at the end of the day.  I am so tapped out at 3:00 that I just clean up a bit and go home.  It worked to go in early, but that is so not happening on a regular basis!  It was nice just to go in and work.  I took a picture of all the stuff I purged, but did not bring my cord home to download the pics.  Picture three copy paper boxes full, a medium size garbage can and an overflowing recycling bin!  

I started going through a cupboard and realized that, not only had I not really used the cupboard since the beginning of hte year, but I have stacks of papers in there.  Sadly, there was some student work from last year that was squirrelled away and class sets of copies.  Lots of recycling!  I hate throwing things away, but I feel like you have to balance conservtion with sanity sometimes.

On a personal note, it is winter break week and I am busily preparing to host a baby shower for my SIL.  Somehow I have to fit 25 people in my little hosue and make it appear as if I am always ready to host a crowd.  I have an endless bathroom project underway and am making my storage room/craft room/office usuable by human beings. 

Oh, I also have a BIG event tomorrow afternoon...and report cards go home in a week.  No pressure of anything!!!

Well, off to bed - I hit zombie mode about 2 hours ago!


Photobucket

Monday, December 19, 2011

New Behavior System

I revamped my behavior system  last week.  It’s a terrible picture, but my cellphone is not great.  I went back to my old ring and clip system.  I was using the clip chart that has been all over blog world.  It just wasn’t working for me.  Only a few kids were getting to the top, I was forgetting to use it, and the kids that really needed to have consequences were sometimes able to get out of it by doing something to get their clip out of the hot zone.  I just really needed to tighten down on some of the behaviors.

1215111428_thumb

Long story short, this system really works for me. It uses a pocket chart with several pockets per row.  I think is was for attendance.  We have a system widely used through my building call  ”Shoot for a Rainbow.”  Some use the clip style system.  I use cards in the order of a rainbow on a ring.  The last card is a rainbow.  The kids switch their cards as a reward.  The cards do not go back to red every day.  The kids keep flipping until they get to the rainbow. 

Different teachers use the rewards is a ton of different ways.  I put a card in the back of the pocket with the students’ names and, when they reach the rainbow, they put their name card in the pockets at the top with rewards.  They are easy, but effective rewards.  I usually pick 3 or 4 rewards for a month or so.  I currently have:

  • read to the class
  • share
  • line ender
  • switch seats

They cost nothing and result in the minimum of interruption.

The clips are the  reminder/consequence system.  It aligns with 1, 2, 3, Magic, which is another system popular in my school.  The clips all begin on green.  The yellow is a reminder, the orange is a warning with 5 minutes of recess owed, and the red is 10 minutes of recess owed and a parent phone call.  This has worked wonders this week!

I guess I have learned once again that I should K.I.S.S. (keep it simple silly).  I changed a lot of things this year because I loved how someone else did it and realized I should stick to what works rather than try to use something that doesn’t work for me.  It was taking too much time and energy to change my thinking and was consistent enough.

I am much happier now and I am much more consistent. Behaviors are evening out to a certain extend and, if I can get through this week, maybe everything will hit the mid-year click!

Monday, November 28, 2011

December…Really?!?

Whew!  I was overwhelmed today!  Can you believe Christmas is in no time?!?  I am so far behind!!!  It is one of those years where I spend more time working on classroom community than just about anything else.  I keep hoping things are going to click, but so far it is a no-go. 

I have been reading quite a few posts about the new CORE curriculum.  I am co-grade level chair and writing the new math and ELA curricula for our grade level based on the CORE.  We also have a new program for math.  We thought is would be helpful, but it is also very overwhelming when paired with new math and ELA content.  I am trying very hard to take one thing at a time, but gravy, whose idea was is to address both CORES all at once?!?

Don’t get me wrong, I am really liking them!  It is just that change is really hard.  We do not have and programs or textbooks, so every year feels a bit like reinventing the wheel.  Things are so wide open that is is easy to get carried away. I sat a my table thinking that I needed to really work on planning for math and that led to thinking about how I need to get started with spelling and do more with word study.  Then I thought about the new grammar pieces, and gee, do I really know what I want to do with shared reading before break?  I must not forget that I need to wrap up a family unit in SS and animal classifications in science – and then there are the simple machines kits that need to go back in 3 weeks – yeah, haven’t even started yet.

I know – breath, breath, breath.  I’ve been here before.

One of the lessons that I decided to do to address our classroom community is Warm Fuzzies and Cold Pricklies.  Oddly enough, I remember this lesson from when I was in second grade and my teacher taught us about them.  The intent is to support students in treating each other kindly.  This is tough for my students this year.  Forming friendships is a challenge and I want to work on kindness in the classroom.  I plan to introduce the concept of Warm Fuzzies and Cold Pricklies by brainstorming the things we can do and say that are kind and hurtful.  Then we are going to make Warm Fuzzies to remind students about kindness.  Finally, I am hoping to carve out time for students to share when others are warm fuzzies and make a paper chain.  If you are interested in the materials, click below to access the materials.

image

How do you encourage a positive community in your classroom?

Saturday, October 8, 2011

Do the Twist and Shout

My kids are eating up movement activities this year! I have these huge 4 hour blocks in the morning and that is rough at the beginning of the year. I have 2 great activities to share with you!

The first I call “Dance, Dance, Freeze.” I’m not sure if this is an actual game. If it is , please let me know I will give someone credit. I put on a fast c.d.. Right now I am using the sound track from The Frog Princess. I play the c.d. and the kids dance. Periodically I stop the c.d. and they have to freeze. It is fun to see who gets into it and who takes some time before they will take the risk to dance. It is also fun to see how they interpret different paced songs. Any other ideas for great c.d.s?

image

The other activity I uses dice. I used the wooden cube from math and write exercises on one and what to count by on the other. I roll the dice and we count and do the exercise. This really breaks up large blocks of time and gets the wiggles out.. It is also a great activity to leave for subs to do. I made dice to copy onto cardstock. They are pretty durable if you wrap them in a layer of packing tape.

image

Enjoy!

Thursday, July 7, 2011

Classroom Jobs Linky Party

I think I am obsessed with linky parties! They finally convinced me to come out of my blogging shell and take my blog public!

Mrs. Dillard is having a Linky Party on Classroom jobs! And I decided to join in!

I love to see how people manage classroom jobs! In my 1o years of teaching, I have never been able to pull off classroom jobs. I have set them up about a dozen times and have never kept up with it. I have tried having a few jobs and I have tried giving everyone a job. The problems were the that I was horrible at changing the jobs every week and I was terrible at either reminding the kids of their jobs or making time for them to do the jobs.

So, the last few years I have stuck to having a VIP. I put all of the kids names on cards and put them on a loose leaf ring. I have the ring on my Business Board where I keep all of the details of our day. I just switch the card each day and that child is responsible for all of the jobs in the classroom for that day. They are the line leader, the messenger, the paper passer, and so on. They can choose a partner to help them out. This is my go-to person for the day and it works sooo well!

Click here to read more about my Business Board. I will try to update with a picture if I can get into my room in the next week. When I was in yesterday, it was completely bare and everything was stacked in the hall!

Reading the great ideas that have been posted so far have made me want to think about having jobs again. Maybe if I get myself organized this year, I can keep up with the task of changing and doing classroom jobs. I am truly finding that, as I learn so much from everyone in blogland about organizing my classroom, as I become more organized I have more time to plan and be creative. Giving jobs may help me to cut down on the endless hours I spend in my classroom because the kids would be taking on some of those jobs. Hmmm - I need to think more about this!

Hook up with Mrs. Dillard to share your classroom jobs!

Tuesday, July 5, 2011

Bucket Fillers - Part 4

Bucket Fillers - Part 4
Reading Response Activity


So, I didn't plan to write another post, but I thought I would share my reading response activity that I did with Have You Filled a Bucket Today? by Carol McCloud and David Messing.

I read the Bucket Filler books at the beginning of the year to set up my behavior management systems and to start class meeting routines. I also do a Kevin Henkes author study to talk about behavior and characters in books. This led to an end-of-the-year writing piece where I reread Have You Filled a Bucket Today? and our favorite Kevin Henkes books. Then we brainstormed how we have filled buckets this year, referring to the poster we made at the beginning of the year on ways to fill people's buckets. Then we talked about how the characters in the Kevin Henkes books did or did not fill the buckets of other characters.

You can click here to get your copy.

It was a great discussion and I could tell that the idea of filling buckets really stuck with the kids!

Managing First Day Supplies

Mrs. Kincaid's First Grade is having a linky party on organizing those beginning of the year supplies! Click on the tag to check out the links!


I have dealt with supplies in two ways. Not sure I have found the best way yet, but here is how I have done it in the past.

We have a Meet the Teacher Day during our Superintendent's Conference Days before school starts. This has been nice because it is scheduled right into our day, or has been for two years now. We used to schedule it on our own and finding a date and time could be tough.

Students receive a supply list with their placement letter in July. The supply list is also posted on the district website and I post it on my website. To be honest, I have asked for a bit more this year. Everyone is taking pretty big budget cuts and I can't justify the shear amount of money that I spend on classroom supplies, so I asked for a few more things. I also tend to rotate items on my list. I have TONS of hand sanitizer, but have run really low on plastic bags, so I switched them out on the list.

The first way I dealt with supplies was having the students sort them on the Meet the Teacher Day. This worked well for me, as I set it up as a scavenger hunt and the kids toured the room while the sorted. I had part of the hunt where they put certain things in their toolbox and the rest in crates around the room. It effectively sorted all of the supplies, but I think it was more than the parents bargained for! They weren't expecting to have work to do and I think it was a bit overwhelming to them. Funny how tough following directions can be, even when you're an adult!

The second way I have dealt with supplies is by placing large paper grocery bags in student coat cubbies for all of the supplies. In my room, we have individual sections for each student to hang their items. (Actually, now that I think about it, that was my old room. My new room has a bit of a storage crunch for student stuff and I am working on dealing with that this summer.) On the first day, I used this as a sorting activity. It was a great idea in theory, but the management of it was hard. The kids had to either sit and wait or work together cooperatively and we had not created routines yet. It was definitely easier for the parents, but rough on the teacher!

This year, due to storage issues and reflecting on what worked best, I think I will return to the students sorting with their parents. I think it was a good way to communicate how important the home-school connection is and provides a nice sample of how the classroom works.

I can't wait to see how everyone else does this!


Managing First Day Supplies

Mrs. Kincaid's First Grade is having a linky party on organizing those beginning of the year supplies! Click on the tag to check out the links!


I have dealt with supplies in two ways. Not sure I have found the best way yet, but here is how I have done it in the past.

We have a Meet the Teacher Day during our Superintendent's Conference Days before school starts. This has been nice because it is scheduled right into our day, or has been for two years now. We used to schedule it on our own and finding a date and time could be tough.

Students receive a supply list with their placement letter in July. The supply list is also posted on the district website and I post it on my website. To be honest, I have asked for a bit more this year. Everyone is taking pretty big budget cuts and I can't justify the shear amount of money that I spend on classroom supplies, so I asked for a few more things. I also tend to rotate items on my list. I have TONS of hand sanitizer, but have run really low on plastic bags, so I switched them out on the list.

The first way I dealt with supplies was having the students sort them on the Meet the Teacher Day. This worked well for me, as I set it up as a scavenger hunt and the kids toured the room while the sorted. I had part of the hunt where they put certain things in their toolbox and the rest in crates around the room. It effectively sorted all of the supplies, but I think it was more than the parents bargained for! They weren't expecting to have work to do and I think it was a bit overwhelming to them. Funny how tough following directions can be, even when you're an adult!

The second way I have dealt with supplies is by placing large paper grocery bags in student coat cubbies for all of the supplies. In my room, we have individual sections for each student to hang their items. (Actually, now that I think about it, that was my old room. My new room has a bit of a storage crunch for student stuff and I am working on dealing with that this summer.) On the first day, I used this as a sorting activity. It was a great idea in theory, but the management of it was hard. The kids had to either sit and wait or work together cooperatively and we had not created routines yet. It was definitely easier for the parents, but rough on the teacher!

This year, due to storage issues and reflecting on what worked best, I think I will return to the students sorting with their parents. I think it was a good way to communicate how important the home-school connection is and provides a nice sample of how the classroom works.

I can't wait to see how everyone else does this!


Classroom Management Linky Party

Miss Kindergarten is hosting a Classroom Management Linky Party!


It looks like this party is about volume control in the classroom. This has always been tough for me, because I have a really soft voice and have a hard time talking over loud groups. When I taught older grades, eventually the classes took on my tone and ended up being quieter groups. That does not seem to be the case in 1st grade.

Our building uses a 3, 2, 1, 0 system throughout our building.
3 = Outside Voice
2 = Talking Voice
1 = Whisper Voice
0 = Silent Voice
This system works really well and we have posters in our classrooms and throughout the school. I made small versions to tape onto my computer stands next to our log-in codes for different sites. The kids always seem to forget that computer time is not a talking time.

When we have Writing Workshop or Reading Workshop times, I put up a sign on the board that reminds the students of the noise level. I got this idea somewhere along the way years ago and make a big deal about putting the sign up. It means that it is silent so that our brains can do our best thinking. Since we now have Promethean Boards in our classrooms, I have made the signs as charts to put up on the electronic whiteboard.

Click here to get the paper version.


Along with the visual signal, I also give a verbal signal. I count backwards to signal that it is a quiet work time: "3, 2, 1, and 0 - It is ______________ time."

The other thing I do to control volume is to play music in the classroom. Years ago I bought a set of nature cds. When I play them, the students know that it is a quiet working time and if they cannot hear the music, they are too loud. It seems to fill the void when kids talk just because it is too quiet. They even request the music to be played! It calms everyone!


I can't wait to find a few new ideas from other posters!

Monday, July 4, 2011

Bucket Fillers - Part 3

Bucket Fillers - Part 3

Using Bucket Fillers with the Existing System


Click here to see part 1
Click here to see part 2
Click here to see part 3
Click here to see part 4

Today, I wanted to reflect on my two "old" behavior systems and how I am going to modify them to work more closely with the Bucket Filler books.

First, I will maintain my reminder system with the clips. I might add some clip art to the circle stickers of a dipper. With the rainbow card system that I explained in part 1, I had changed my system slightly last year, but am returning to the pocket chart system this year. I thought I could connect the system to the Bucket Fillers, by adding bucket clip art to the rainbow cards to reinforce that the kids are filling buckets when they change their card.

I also plan to put the rewards for reaching the rainbow on cards with buckets on them. I might even put the rewards the class brainstorms in a little bucket to pull out each month.

Last year I also brainstormed ways to fill a bucket with my students and made a giant chart to hang on the wall. I wish I had taken a picture before I tore down my room.

At the end of the year, one of my colleagues had the great idea to use the Bucket Filler books as a reader response, on of our required writing sample pieces. I took it a step farther by having students make a text-to-text connection between the Bucket Filler books and the Kevin Henkes books that we LOVE! They did a great job reflecting on how a character from one of the books was a "bucket filler" or a "bucket dipper" and why.

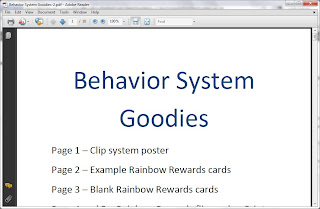
*** Update: I spent some time creating some printables for these systems for next year. They are uploaded to Google Docs. If anyone uses these, please give feedback on how the upload from Google Docs goes - this is the first time I have tried to do this!

Clicks here for printables from this series of posts!

Sunday, July 3, 2011

Bucket Fillers - Part 2

I started this series of posts with the intention of talking about the Bucket Filler Books, but quickly realized that I was reflecting on my old behavior systems and how well they worked. I tried a few new things this year and just did not find the success with behavior that I had in past years. So, I am returning to what worked. Sometimes the motto is "Don't fix what isn't broken!"

When I started teaching at my current district, I was introduced to 1, 2, 3 Magic and found the method worked really well with little ones.

The premise is that you reduce discussion and the temptation to debate with kids about their choices and behavior by simply counting them as a reminder that there is a concern that needs to be fixed. For example, if you have a child who is interrupting during calendar, you would say "______ that is 1 for interrupting." Consecutive reminders would be followed by "That's 2." and "That's 3." Without discussion. Then 3 is reached, there is a consequence, such as leaving the group to reflect on behavior. Of course, the system needs to be explained and modeled before implementing.

I found this worked really well and was a great tool for parents as well. There is a parent version of the book. I liked the quick feedback for the kids and the reduction in negotiation. You know there are those kiddos who have an amazing talent to debate you into oblivion.

I did find they needed a visual to connect to this system. I know that people debate about having negative consequences and having visual systems, but I feel children really need to know the boundaries of what isn't acceptable, as well as what is acceptable. If we only point out the positive, I think we are only teaching children to regulate part of their behavior. Things that we need to remember when dealing with behavior is that it needs to be consistent, students need to be aware of their expectations, and they need to learn from their choices to be more responsible classroom citizens.

So, I combine the 1, 2, 3, Magic philosophy with the Rainbow System in the last post. I used the same pocket chart to save space and connect the reminders to the positive reinforcement system.

I bought clothes pins and put magic numbers on each clip. Then I used the garage sale stickers and place a green, yellow, orange, and red dot at the top of the clear part of the pocket in each section of the pocket chart. The clip were then put on the green dot. With each reminder, the clip was moved. I worked with the students to establish consequences, but in general, I worked towards the following:

yellow = reminder
orange = warning and 5 minutes off recess
red = 10 minutes off recess and a call home.

Later in the year, I started to have students change their rainbow card if they stayed on green. This is a great system for subs to use. I could always follow up as necessary based on where the clips were at the end of the day and reward students who were on green.

Again, I will try to take a picture of the system and add it this week.

Friday, July 1, 2011

Bucket Fillers - Part 1

Bucket Fillers Part 1
My Old System for Positive Reinforcement


Click here to see part 1
Click here to see part 2
Click here to see part 3
Click here to see part 4

The Bucket Filler books and concept are amazing for working with little kiddos. I read the bucket books to my class for the first time three years ago. The basic concept is that everyone has an invisible bucket and when we are kind, we fill their bucket (and our own too) and when we are unkind, we dip from their buckets (and ours too). For some reason, of all of the character ed. things that we do, this one resonates with the kids. Even when I only read the book during the year, the students were using the language during class meetings.

So, how did this translate into the room? I tried using the little buckets for the kids (I scored a great deal at a yard sale!) and bought little puff balls at the dollar tree. The kids received and gave the puff balls to friends for filling their buckets. To be honest, it drove me insane! I couldn't keep up with handing out the puff balls and the number of times I was asked about the buckets in a given day really interrupted instruction. I never was able to come up with a fair and easy way to tell when buckets were full and the kids were always asking about what they would get when they were full. At any rate, the time out of the day to deal with it far outweighed the usefulness.

So, I decided to go back to my old system that worked well for me and was manageable, but added a bucket theme. I wish I had pictures and maybe I will remake it this coming week for next year. I used a system that was prevalent throughout the school called "Reach for a Rainbow" and the premise is that kids move through the colors of the rainbow for showing good character. You would just tell them to move their card or clip to move through the rainbow. When they reached the end, they earned a reward.

Another teacher had the idea of combining that with a reminder system that followed 1, 2, 3, Magic. The kids would move their clip or card through green, yellow, orange, and red for reminders and warning with different consequences at each level.

I bought a pocket chart that was meant for attendance, I think. It had stars on one side of the cards and something red on the other side. The kids would flip their cards when they came in to show they were there, similar to the one below. It worked perfectly for the system.


I laminated construction paper in the colors of the rainbow and a piece of black paper for the end of the rainbow. I cut the paper to fit in the pockets and stacked up a rainbow set for each child. The black card at the end featured a rainbow sticker to show they had reached the end of the rainbow. The kids would then slip the front card to the end in their pocket when they were told they could change their card for a positive choice or behavior.

This worked pretty well, except for those few kiddos who didn't realized which card came next, or for other reasons, skipped colors and reached the rainbow too early. We then brainstormed rewards for reaching the rainbow. They chose lunch in the room, sit next to a friend, buddy read, read a story to the class and so on. I would choose three rewards for the month and put cards in empty pockets in the pocket chart where the kids could put their rainbow cards and I could remember they needed their reward. After they received their reward, the card were flipped back to red to start over again.

Two changes I made were that I used small binder rings to bind the rainbow cards. There were a lot fewer mix ups and the cards didn't end up all over the floor. Second, I added a rainbow card in each pocket that was separate from the ring that could be placed in the prize/reward pocket. This made for a lot less fuss and the kids could continue to change their rainbow while they were waiting for their reward.


I will try to get into my classroom and find my chart next week to add a picture. Keep reading to see how I modified this system to work with the Bucket Fillers books!

Wednesday, May 18, 2011

Tip Tuesday - Photo Holder/Sign Holder

I went to a staff development a few years ago and a wonderful special education teacher showed us how she used acrylic photo frame - you know the ones that stand up on their own - to display and breakdown instructions for students. It was AMAZING! You can print off your center directions and then write on the front with a dry erase marker if you need to. They can be used to individualize or differentiate when needed. I loved the idea, but it drove me nuts cutting papers to fit every time I wanted to put a new one in the frame.

So, today I was at Staples and found these wonderful "Sign Holders". They are the same thing, only made to hold a regular sheet of paper. Print out your directions and slap them in! They had both vertical and horizontal. I debated for quite a while and then decided to get the 4 pack that contained the vertical ones. The individual ones were on sale for $6 and the 4 pack was at regular price, just under $24. Can't wait to use them during centers!

Wednesday, May 11, 2011

Tip Tuesday - Photo Holder/Sign Holder

I went to a staff development a few years ago and a wonderful special education teacher showed us how she used acrylic photo frames - you know the ones that stand up on their own - to display and breakdown instructions for students. It was AMAZING! You can print off your center directions and then write on the front with a dry erase marker if you need to. They can be used to individualize or differentiate when needed. I loved the idea, but it drove me nuts cutting papers to fit every time I wanted to put a new one in the frame.

So, today I was at Staples and found these wonderful "Sign Holders". They are the same thing, only made to hold a regular sheet of paper. Print out your directions and slap them in! They had both vertical and horizontal. I debated for quite a while and then decided to get the 4 pack that contained the vertical ones. The individual ones were on sale for $6 and the 4 pack was at regular price, just under $24. Can't wait to use them during centers!

Saturday, February 19, 2011

Mini-Makeover

So I am in the midst of a classroom makeover. It is officially winter break for me, but I am excited to have an entire day sometime next week to work on decorating and organizing my classroom. I have to be honest that I have never been the most organized teacher. I appear very left-brained, but have become very right-brained over the years. My mind goes in a million creative directions at once and that lack of focus leads to stacks of papers and lots of piles.


To add to my general lack of organization, I moved classrooms this year. I cried over it. I have moved 6 times in 10 years and this last move nearly pushed me over the edge. I had actually been in my last room for 3 years and had finally figured out where to put things. I think people seriously underestimate the magnitude of moving a classroom.


My new room is 2/3 the size of my old one with less storage and limited space for student coats and backpacks. It also sports/sported yellow tiles and a mustard yellow counter top ala 1970 and is directly across from our cafeteria rather than my previous nice and quiet hallway. However, where my old room had whitish tiled floors and white cinder block walls (very hospital like), my new room has carpet and beautiful woodwork. Plus IT IS WARM! I always froze in my old room.


I guess overall, I like my new room. It is homier and I can actually get dressed in the morning without wearing leggings under my clothes. In general, it does need a lot of work though. When I moved, I shoved almost everything into the cupboards with no rhyme or reason. I am looking forward to having the chance to sift through it all. And the built-ins were pretty beat up.


So far, I have covered the counters with contact paper. I know that it sounds like a nightmare - I hate contact paper. But, it actually looks like I have granite counters installed! People ooh and ahh over it! I like to joke that I got granite counters out of the bargain when I moved. It looks like a whole new room - a bit more modern and the counters are not glaringly obvious when you walk in! New counter color!!!

My To Do List:
1. Move bank of computers to be flat against the wall - for more space and a homier look.

***Done :)

2. Put fabric skirts on computer stands to cover storage.
I have sewed these and they are ready to be attached with velcro. I saved a bundle by using fabric I had on my bulletin boards when my color sheme was more pastelly. I bought RIT dye for 2.69 and dyed the fabric before sewing it into panels. I saved about 10 bucks using the dye!


3. Build/Find/Add to coat cubby storage area.

4. Find/build shelving for under the Promethean Board.
I'm thinking about adding plastic rain gutters for books.

5. Install shelves in the bathroom to store tissues, soap, and hand sanitizer.
Have the brackets from a miscalculation when we build our pantry. Now I just need to get the wall mounts and shelving. And then to install it, of course.

6. Paint metal shelves and venting unit.
What color? They are kind of a coffee color now. Maybe gray?

7. Find new, more narrow book boxes.
I bought mine from the Dollar General this summer. Love them and they work great for the kids, but they are just to wide to fit the shelving units. Right now they are all stashed on those plastic shelving units for garages. Not horrible, it just takes up floor space. Plus they are bold turquoise, lime green, and fuchsia - way too much color!

I LOVE the ones from Really Good Stuff and Oriental Trading, but they are SO expensive!

8. Clean out cupboards.
Easier said than done!

9. Finish installing shelves above the coat cubbies.
One is done. I need to cut a foot off the other board that I bought.

10. Reorganize classroom library.

Hmm! Not too big of a task?!?